Carrying heavy objects for distance or speed is a key to strongman performance and comes with some fantastic training benefits. Almost the whole body is involved in lifting and carrying these objects, and the heart rate also gets elevated.
Weighted carries are functional, time-efficient, and fun to perform. Unfortunately, the barrier to entry for adding weighted carries can be high, with both price and storage space being an issue. Fortunately, the humble sandbag fits in here.
The sandbag is a very versatile piece of equipment and relatively cheap compared to other strongman gear. There is a huge variety of exercises one can do with a sandbag, but we will look at one of the most basic, carrying the sandbag in front of the body.
Table of Contents
Sandbag Carry Technique: How To Carry The Biggest, Heaviest Bag!
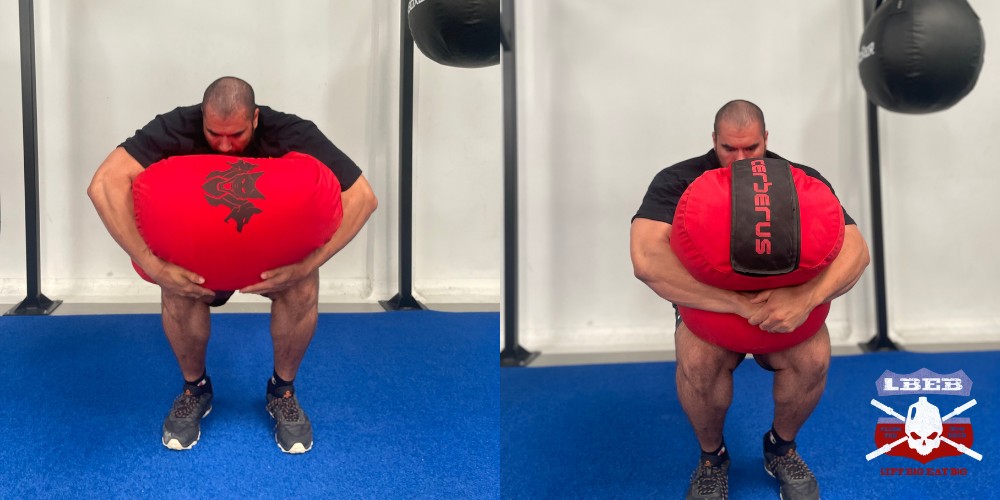
Step 1: Stance And Initial Pick
If the sandbag starts vertically, as most competitions do, you will tip it over lengthways. Place one hand under the top side, guiding it to the floor, and then hook the other hand underneath here. Depending on your height and the bag’s length, you can take a stance shoulder width or wide enough to get the sandbag between your feet.
If the bag is too long or you are shorter, it may work better to keep a shoulder-width stance and place the bag on top of your feet. This will allow you to generate more power than an ultra-wide stance and clear the knees.
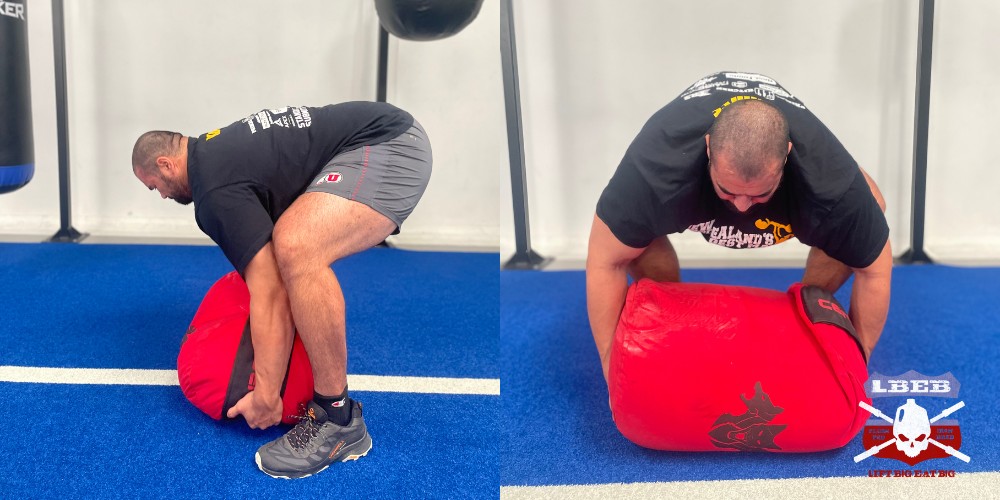
Ideally, you will be mobile enough to bend over with minimal lumbar flexion and get low by pushing your knees slightly outwards and squatting down simultaneously. The position will be similar to a Romanian Deadlift.
Another way to lift if you have shorter arms or on a particularly long bag is to tip the bag forwards and hold it around the middle of the bag.
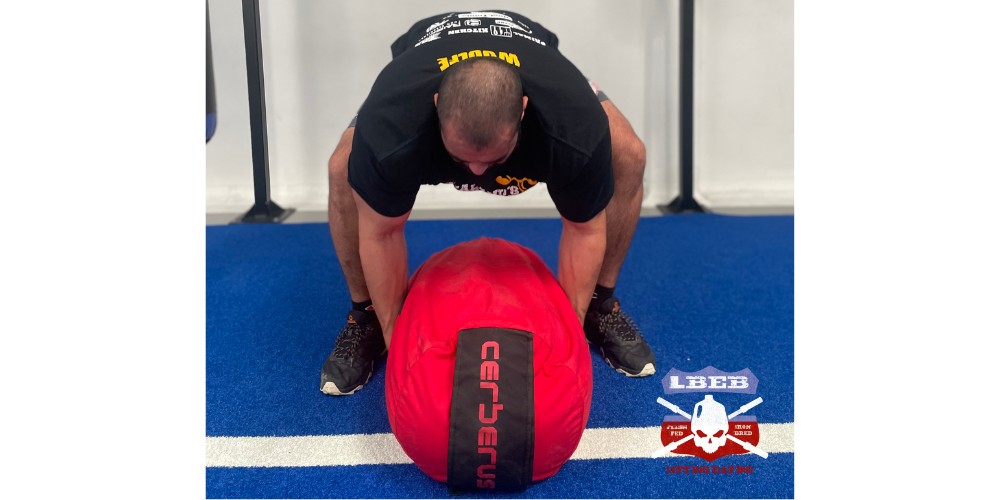
This can be advantageous if the intent is to shoulder the bag, as when it’s lapped, the center of mass will sit higher on your body and require less force to move it upwards to the shoulder. All the other points about being similar to an RDL position remain the same.
Step 2: Leg Drive To Clear Knees
Initiate the pick off the ground by driving the legs into the floor. Think of the arms and hands as hooks. Pulling the bag off the ground with arms alone (flexion or curling the bag towards your chest) can result in excess strain on the bicep tendon, a common injury site for this kind of lift.
After gaining momentum from the leg drive, you will want to stand high enough to pull it onto your knees. Think of this motion like a cheating barbell row, where the initial momentum is gained from a contraction of spinal erectors and leg drive.
Once the barbell has gained momentum and is moving, you use the arms to follow that momentum up by pulling to your chest. As opposed to using the arms to pull by themselves against a heavy dead weight.
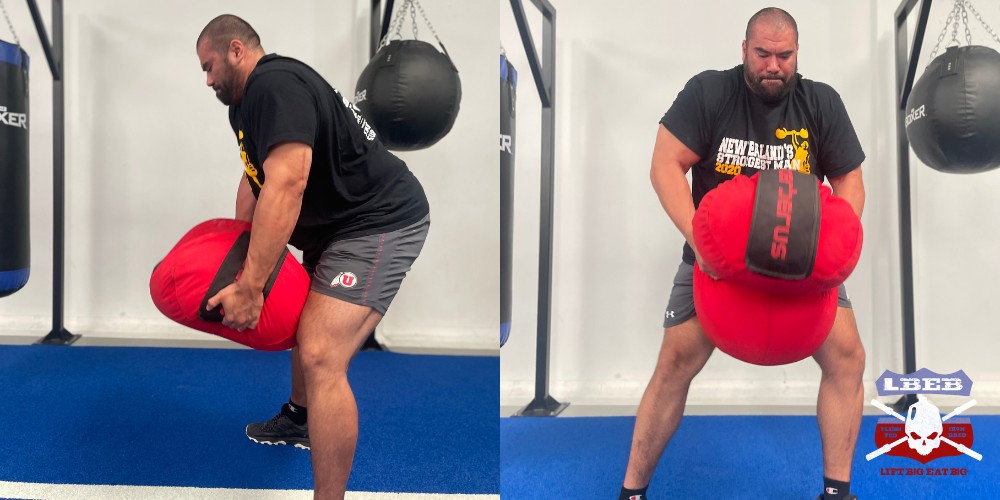
Step 3: Bringing Knees Together And Lapping
Once you have cleared the knees, you can either take a step closer together, bringing your stance in, or keep the feet where they are. Generally, you bring your stance in, it’s easier to rest an implement on your knees as you close off space for the implement to fall through between your knees.
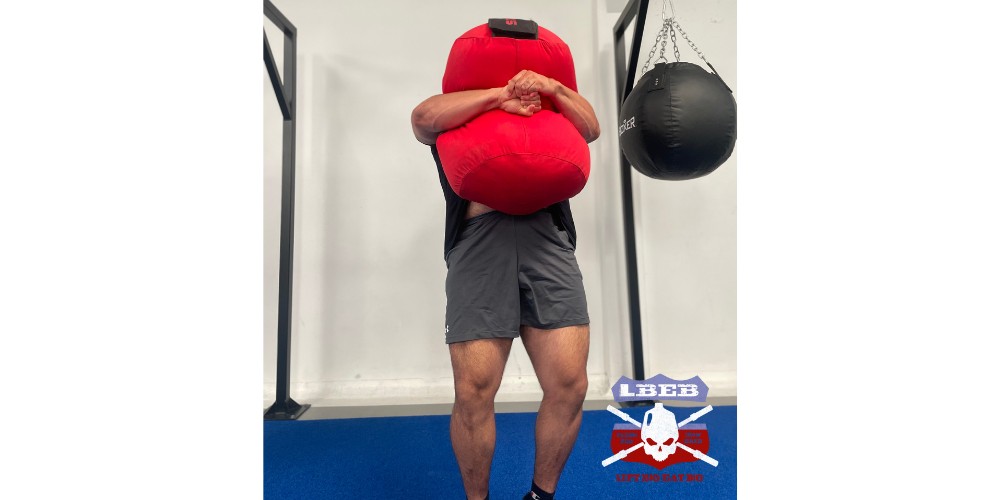
You will want to squat down while pulling the bag close to your body. If you want to get the bag higher on your chest (to load it to a high platform), you must squat down lower while pulling the bag tight into your chest. You will also reset your grip here by trying to reach as far around the bag as possible.
This will help pull the bag tight to your body, and hands and arms are recommended to go around the sides of the bag or slightly over the bag. Never have your arms supinated completely under the bag, as this can put a lot of strain on your bicep tendons.
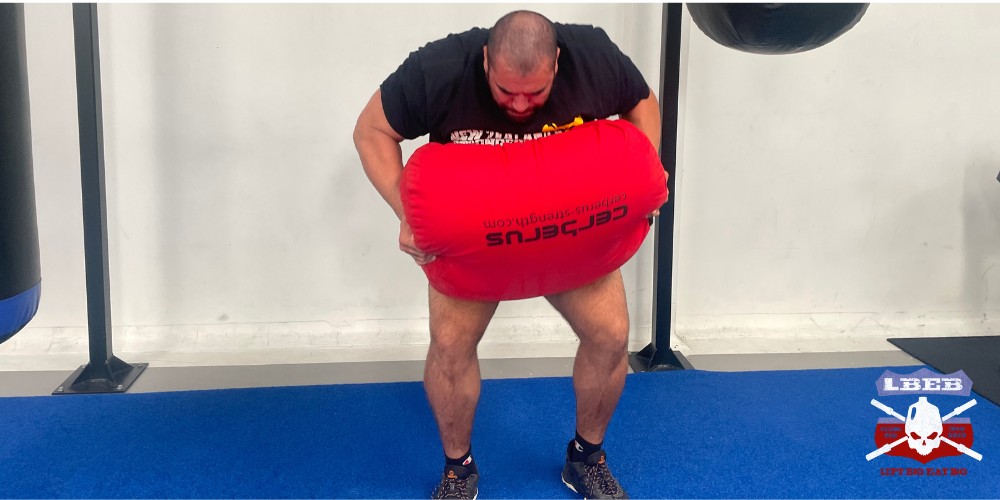
Step 4: Hip Drive & Simultaneously Stand
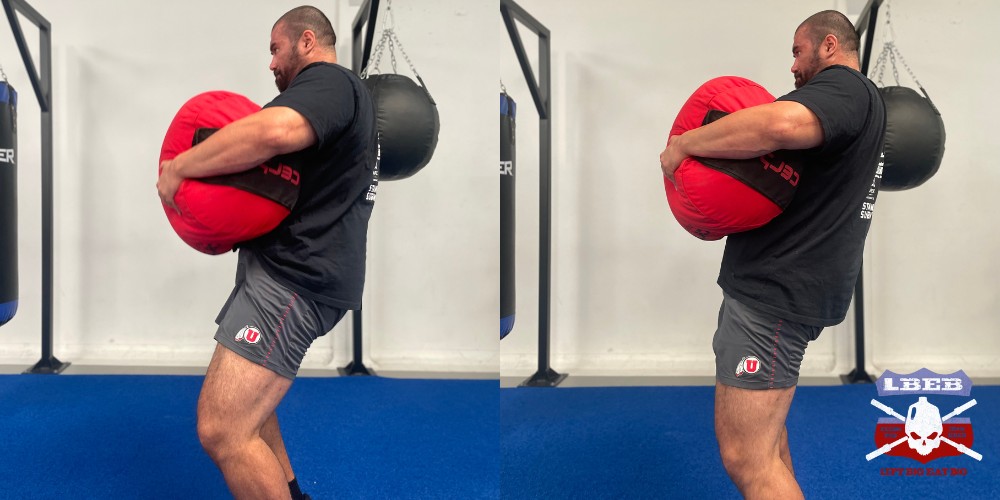
To stand up, you will think of driving your hips forwards and standing up simultaneously. If loading, it will be more of a combination of a hip thrust and front squat movement. If picking up to carry, the hips will not need to go as far into extension.
Step 5: Momentum
Use momentum from the previous step to move forwards, short steps, fast feet, accelerate hard with shorter steps at the start, and open up as you get faster.
Sandbag Carry Benefits
Open-Hand Grip Strength
Sandbags train your grip strength in an open position with the fingers further apart, unlike a barbell, where you can lock the fingers.
This kind of grip strength is fantastic in the real world or strongman competition, as most objects lifted don’t have nice handles. This grip strength can also provide a unique stimulus for regular gymgoers who already do a lot of barbell or dumbbell work.
Unique Combination Of Strength And Conditioning
Carrying the sandbag can raise the heart rate more than static lifting on the spot, but at the same time requires a large amount of muscular strength. This unique combination of trained attributes makes it a very time-efficient workout as you can accomplish much more quickly.
Sandbag Carry Muscles Worked
Just about the whole body is used when lifting, loading, and carrying sandbags. The primary workers will be the upper back and grip to hold the bag in place, while the lower body musculature of hamstrings, glutes, quads, and calves will be working to propel the athlete forwards.
Sandbag Carry vs. Farmers Walk: Which Is Better?
Both are fantastic strongman exercises that give excellent returns on investment. The farmers walk will often involve heavier loads than the sandbag as the pickup height is relatively high. It also stresses the erectors and upper traps more than sandbag carries.
If you have access to both implements, I would train both. Farmers walk after deadlifts, and lighter sandbag carries for distance after squats or front squats is an easy and effective way to do it. If you are training them both, do heavier farmers walks first, then finish off with lighter sandbag carries.
Sandbag Carry Alternatives
Plate Carries
If you don’t have access to a sandbag but have a loading pin (which can easily be made), then plate carries are a good option. They can be hard to load super heavy unless you have thin metal plates. They require open-hand grip strength, provided you don’t grip holes in the plates.
They still require upper back core and leg strength to do effectively and also get the heart rate going—a good movement while you wait for your sandbag to arrive.
Keg Carry
Carrying a keg can be a suitable alternative to carrying sandbags if available. The core mechanics remain the same, but the most common way to lift the keg off the floor is to stagger the hands with one on each side of the keg. You can regrip with the keg on your knees, much like when regripping a sandbag.
Husafell Stone Carry
Picking the Husafell stone or shield implement off the ground is similar to the above vertical sandbag carry. Tilt the object away from you and try to squat down into it.
The Husafell stone or shield carry is once again very similar to the sandbag carry. With this kind of object, it’s often a huge advantage if you can clasp your hands together around the implement. For most regular-sized people, get your hands around the implement and have a slight backward lean.
This will help ensure the biceps aren’t taking most of the load. Use chalk to create friction between your body and the implement to lessen slippage.
Example Sandbag Carry Workout
The easiest way to implement sandbag carries is at the end of a deadlift or leg day for 2 long sets—approximately 2 x 30-50m. If you are training them specifically for a competition, you should simulate the competition or be as close as possible, provided it’s not too heavy.
If training for a loading event, I would train them immediately after squats or deadlifts doing 2-4 sets of 3-6 reps loading over a 1.2-1.5m bar. If training sandbag loads to the shoulder, I would do similar but to the shoulder.
Summary
The sandbag is a fantastic tool not just for strongman athletes but sportsmen and women of most sports. They are easy to access and set up and provide a range of benefits that complement barbell training nicely.